HOT NEWS

Criminals Target CA's BrightStor in New Attack

Jumat, 28 Maret 2008


Jumat, 28 Maret 2008

Cybercriminals have found a new program to attack: CA's BrightStor ARCserve Backup.

Just days after Microsoft warned of attacks targeting its Jet Database Engine software, cybercriminals have found a new program to attack: CA's BrightStor ARCserve Backup.

The new attack was reported Monday by Symantec, which said that a malicious Web page with a .cn domain was serving the attack code. By tricking an ARCserve user into visiting the Web site in question, attackers could leverage the flaw to install malicious software on a victim's PC, Symantec said.

A proof-of-concept example of the code was made public last week on the Milw0rm.com Web site. Symantec quickly predicted that it would likely be modified and used for attack.

The flaw lies in the Unicenter DSM r11 List Control ATX ActiveX control, found in ARCserve Backup version 11.5, Symantec said. Other versions of the product may also be vulnerable, however.

CA has not commented on the bug, so there is no indication when it might be patched.

Turn Off ActiveX Control

Symantec is advising users to turn off the buggy ActiveX control within the Windows Registry, something that should only be attempted by technically savvy users.

"Until a patch is available, we urge users to set the kill bit on the affected CLSID [Class identifier] for workstation or terminal server computers that have this software installed," Symantec said in an alert sent out Monday to users of the company's DeepSight threat management system. The CLSID for the CA control is BF6EFFF3-4558-4C4C-ADAF-A87891C5F3A3. Symantec said.

It's not the only vulnerability that system administrators are worrying about this month.

On March 3, Panda Security reported that a flaw in the Jet Database Engine software that ships with Windows was being exploited by attackers who were distributing malicious .mdb (Microsoft Access Database) files in public forums.

Late Friday, Microsoft issued an advisory on the issue, saying that it could affect Word users, and possibly users of other Microsoft products as well. According to Symantec, Microsoft's advisory relates to the same malware that Panda had spotted.

Microsoft has not said when it intends to patch this bug, but has not ruled out the possibility of an emergency patch.

Step-By-Step: To Get Just the PC You Want, Build It Yourself

Jumat, 21 Maret 2008


JUMAT, 21 MARET 2008

You can construct your own fully equipped system for about the same amount of money as an off-the-shelf configuration.

"Dollar for dollar you'll get more power and features in a PC assembled by a big company than in one you build yourself." That's the conventional wisdom. But new standards and improved component integration that packs more functions into fewer parts now allow you to build a modern system for the same cost as a similarly equipped retail PC.

Follow these steps to assemble an up-to-date machine whose system components should total only about $800, plus something like $400 for a flat-panel LCD, amplified speakers, and Windows XP (all other software is either bundled with hardware or available for free). See our invoice for the details.

To keep things simple, we bought all of our items except the OpenOffice application suite (which is a free download) from a single supplier, NewEgg.com. Limiting the number of sources for your components may reduce your shipping costs and save you time, and it's less aggravating to place and track a single order.

1. Get ready: To protect the components from damage, keep them in their antistatic packaging until you're ready to put them in place. Wear an antistatic wrist strap clipped to a bare metal spot on the chassis, or touch the chassis frequently to equalize your charge relative to it. Handle the motherboard, processor, memory modules, and other sensitive parts by their edges only, and don't touch any socket or connector pins. Finally, make sure the system is unplugged until you're ready to start it for the first time.

2. Prepare the chassis: Take the cover off the chassis and remove any instructions, assembly hardware, or loose cables inside the case. If the chassis has a removable motherboard tray, take it out. Remove the I/O shield from the connector area by pressing inward on the shield until it pops into the case (see FIGURE 1). Locate the I/O shield that came with the motherboard and snap it into the connector area in the chassis from the inside out.

3. Add the motherboard: As you place the board into the chassis, align the rear-facing connectors with the holes in the I/O shield. If your case uses a motherboard tray, install the processor and memory onto the motherboard first (see below), and then slide the board and tray securely into the chassis.

With the tray removed from the case, set the motherboard atop the mushroom-shaped standoffs at a slight angle from the front of the board to the back, and then press down until the standoffs protrude through the holes in the board. If your chassis uses conventional screws to hold the motherboard, you may have to move or install brass standoffs to match the pattern of holes in your motherboard. Once that's done, set the board down over the standoffs until they line up with the holes, and install the screws to tighten the board.

4. Place the processor: If you are using an Intel processor, install it in the LGA (land grid array) socket on the motherboard (see FIGURE 2). Conventional CPU designs put the pins on the processor, but LGA has them in the socket instead. In either case, don't touch the pins or contacts: They are very delicate and prone to physical and electrostatic damage.

LGA775 sockets, such as the one on our motherboard, use a lever to clamp a load plate over the top of the CPU. Disengage the lever from the latch, raise the plate, and remove its plastic cover.

Remove the plastic cover from the processor to expose the contacts on the bottom. Hold the processor by the edges and locate the pin-1 indicator and orientation notches on its sides. Line up the notches in the chip with the orientation keys in the socket. Close the load plate over the top of the processor, and clamp it down.

5. Keep it cool: To attach the heat sink to the motherboard, align the four fasteners with the holes in the motherboard and press each fastener down until it clicks (see FIGURE 3). AMD heat sinks have four clips that click into place before you lock their levers. Make sure the fasteners are fully seated and the heat sink's base is flush against the motherboard.

Connect the CPU fan to the proper head on the motherboard. LGA775 processors use a new four-wire fan connector with an extra signal that allows the motherboard to control the fan speed. Plug this connector from the heat sink into the four-wire "CPU FAN" connector on the motherboard; normally this connector is next to the processor socket.

6. Don't forget the memory: Our system uses two 512MB modules for a total of 1GB of RAM. To operate in dual-channel mode on our motherboard, we installed this pair of modules in the blue sockets.

To install DDR2 modules, open the locking tabs to the side and then insert the module into the socket so that the notch aligns with the tab. Press the module firmly straight into the socket until the tabs lock the module into place.

7. Insert the add-in cards: Next, install your video card and any other add-in boards by removing the slot cover, inserting the card firmly in the appropriate slot, and securing it using either the screw from the slot cover or the appropriate card retention mechanism in your case.

8. Park the drives: Pull the locking levers on each side of one of the lower 3.5-inch bays forward (away from the chassis). Slide the drive into the bay with the connectors facing back (see FIGURE 4). With the drive in place, press the locking levers inward. Don't install the cables yet. With some cases, you use four screws to secure the drive. Accessing these screws in the tight quarters of a case is a major cause of scraped knuckles, which explains manufacturers' shift to levers.

9. Add a DVD burner: Slide the locking lever of a 5.25-inch bay to the unlock position, place your DVD or other optical drive into the bay, and, once it's fully seated, relock the lever. As with the hard drive, don't connect the cables yet. Note that some cases hold the drive with external locking clips.

10. Adjust your cables: On the front of the chassis are a power switch, reset switch, power LED, and hard-drive LED. Find the cable for each and plug it into the appropriate front-panel switch/LED connector on the motherboard (see FIGURE 5). Look to your motherboard's manual or the legend printed on the motherboard for guidance.

Next, locate the internal USB, FireWire, audio, and other I/O connectors on the motherboard and attach their cables to the appropriate ports. The assorted cables and connectors should be keyed to prevent improper installation, but consult the diagrams in your motherboard's manual to be sure that you have all of the cables and connectors matched.

Now connect the data cables to the disk drives. The 80-conductor ribbon cable attaches the parallel ATA port on your motherboard to the DVD drive, and the thin Serial ATA cable links the first SATA port on your motherboard to the hard drive (see FIGURE 6). SATA cables plug in only one way. If the ribbon cables aren't keyed, note the odd-colored pin-1 wire, which matches up to the small triangle or pin-1 indicator marked on the motherboard and drive connectors. Once you have the cables attached, route them so they are out of the way and do not interfere with airflow through the case.

11. Add the juice: Plug the large 24-pin main power connector and the 4-pin 12V connector into the motherboard. The DVD drive uses a single 4-pin peripheral power connector, while the hard drive uses either a 4-pin peripheral power connector or a 15-Pin SATA power connector. Route the cables out of the way inside the case, and neatly bundle or tie off any remaining unused power connectors to keep the airflow unobstructed (see FIGURE 7).

The chassis we used in our PC has a large, 120mm rear-mounted fan for added cooling. Plug the three-wire connector from your fan into the matching "REAR FAN" connector on the motherboard. Some case fans also take a standard 4-pin peripheral power connector.

12. Link outside the box: Attach your display, keyboard, mouse, and speakers to the appropriate color-coded connectors on the back of the system.

13. Turn it on: Attach the power cord and press the power button (don't forget to power up your display too). Insert the Windows XP CD-ROM and allow the system to boot from it. Once you've applied the network settings you received from your ISP, browse to OpenOffice.org to download your free applications. If you have problems loading Windows or other software, read Lincoln Spector's tips on troubleshooting a Windows installation. When you are satisfied that everything works, close the case by reattaching the chassis front and side panels.

Six Steps to a Faster Broadband Connection

Senin, 17 Maret 2008

SENIN, 17 MARET 2008

If you're serious about the Internet, chances are you spend anywhere from $30 to $99 per month for a broadband Internet connection. But regardless of how much you pay, are you getting all the speed that your ISP promised you? And does your connection persist reliably without dropping out frequently or requiring modem reboots? With our quick guide, you can squeeze every last kilobit-per-second (kbps) of throughput out of your broadband modem and keep your connection running smoothly.

1. Test Your Connection Speed

Speedtest.net; click for enlarged image.

Before you start tweaking, get a baseline reading of your downstream and upstream connection speeds at Speedtest.net. If possible, measure the speeds at different times of day, especially during the hours when you use the connection most frequently, and at least once after midnight or 1:00 a.m. (when competition for bandwith is likely to be at its lowest level).

2. Update Your Firmware or Get a New Modem

If your cable or DSL modem is more than a couple of years old, ask your Internet service provider for a new one. The exchange will probably be free; and if there is a fee, you can usually waive it by agreeing to a new one-year contract. The latest cable modems meet the DOCSIS 2.0 (Data Over Cable Service Interface Specification) standard. If you have a 1.1 modem and a high-throughput plan, you'll likely experience a large speed increase just by swapping modems.

Even with a brand-new modem, make sure that you have the latest firmware installed. I upgraded my two-year-old Efficient Networks 5100b DSL modem from firmware version 1.0.0.39 to 1.0.0.53, and immediately saw my Speedtest throughput increase from 5.3 mbps to 5.9 mbps, just a hair below the 6 mbps that I'm paying for. Cable providers such as Comcast usually push new firmware to modems, so there's no need for most cable modem users to perform upgrades themselves.

To update your DSL modem, you'll have to connect to its Web interface, which means that you'll need to know the IP address of the modem on your local network. This information should be in your user manual; alternatively, you can find default settings for most modems on the Internet. The address will probably look something like 192.168.100.1 or 192.168.0.1. Enter this character string into your browser, and the Web interface should come up. You'll likely have to sign in, using either a security code printed on the bottom of the modem or a default username and password (unless you previously changed it). Write down the log-in information for future reference.

Modem Firmware; click for enlarged image.

Once you've logged in, check the firmware number on the status page, and see whether a newer version of the firmware is available on the manufacturer's site. If it is, download this more recent firmware to your PC, and then find and run the firmware update procedure from the modem's browser utility. Reboot, rerun Speedtest, and see whether your data is traveling faster. Besides boosting transfer speeds, using a new modem or updated firmware can solve a host of nagging connection issues, such as intermittent dropouts.

3. Check Your Modem Parameters

Modem status screen; click for enlarged image.

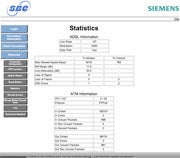
While you're updating the firmware, check some key parameters. First, the maximum allowed speeds (both downstream and up) should match your service plan. If they don't, your ISP didn't set your service up properly. Give your ISP a call and ask it to fix the setup remotely.

Second, look for signal-to-noise ratio (or SN margin) and line attenuation, both measured in decibels (dB). The lower the signal-to-noise ratio, the more interference you have, and the greater the number of packets that will need to be re-sent because they didn't come through the first time. For this reason, a noisy line can dramatically cut throughput. Line attenuation measures the drop in voltage that comes with splitting the signal (especially for cable modems) and with long runs of cable or older wiring. Excessive signal loss will cause a drop in throughput.

For DSL modems, anything above about 50 dB for line attenuation is poor, and 20 to 30 dB is excellent. For signal-to-noise ratio, 7 to 10 dB is marginal, and 20 to 28 dB is excellent. My modem's SN margin registered at 12.5 dB, barely reaching the good range, and its line attenuation reading was 30.5 dB, which rates as very good. Note that acceptable ranges may vary depending on your service level and modem type (faster connections need to be cleaner), so check with your cable or DSL provider to see what numbers you should look for.

4. Troubleshooting Line Quality

If your off-peak Speedtest numbers didn't measure up to your plan's specifications, and if you found poor signal-to-noise or line attenuation numbers, it's time to troubleshoot your wiring. Excessive noise may cause intermittent dropouts, too.

Your first task is to determine whether the signal is already degraded when it reaches your house or whether your own wiring is at fault. To test this, move your cable modem as close as you can to where the wire first splits. If possible, take a laptop and power cord for your modem outside to the junction where it connects to the house. Retest and see if things improve. If they don't, call your cable company. If your own wiring looks to be at fault, reduce the number of splits that occur before the wiring reaches your modem, and/or replace the wire itself, which may be faulty. The ultimate solution for cable modems is to create a split directly after the junction box, and then run a clean new cable directly to your modem, using the other split for all of your TVs (which are less affected by noise).

For DSL modems, noisy inside wiring tends to be due to the other phone equipment on your line. This interference is supposed to be controlled by the filters placed between the wall jack and each device. Make sure that they are all in place. If you still have too much noise, the best solution is to install a "DSL/POTS splitter' immediately after the phone box, where the wiring comes into the house, and then run a dedicated "homerun" wire straight to the modem. This arrangement will completely isolate your modem from the regular phone wiring--and the new wire should help too.

If you don't want to do this job yourself, you can ask your cable or phone company to perform both tasks for a fee.

Finally, improper grounding can be a source of noise, especially on cable. Make sure that all of your TV equipment is plugged into properly grounded outlets, with polarized plugs oriented in the right direction, and without any three-prong-to-two-prong adapters. If you have an electric outlet tester, use it to check for excess voltage on your cable wiring. An electrician can find and fix any grounding problems, which are safety concerns as well.

5. Optimize Software Settings

Now that your cable or DSL line is as clean as you can make it, you're ready to tweak your system and applications for maximum performance, too.

For optimizing network performance parameters in Windows XP or Vista, we like TotalIdea Software's Tweak-XP Pro Premium [DOWNLOAD TK] and TweakVI Premium [DOWNLOAD TK]. Both programs simplify optimization without requiring you to understand Registry editing or hidden Windows settings. Both packages include dozens of tweaks in addition to network and browser adjustments. The Pro version of Network Magic, an excellent network monitoring utility, includes optimization capabilities as well.

Firetune; click for enlarged image.

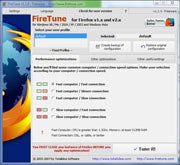
System-level optimization is less important in Vista than in XP, since Vista tunes your TCP stack dynamically. In fact, Vista users can probably get away with just optimizing specific applications, especially their browsers. To speed up Firefox page displays, try Firetune [DOWNLOAD TK] or Fasterfox. Both are free and one-click easy. Fasterfox adds a few more customization options for expert users. Both tweak low-level Firefox settings such as cache memory capacity, maximum simultaneous connections, and "pipelining" (performing multiple data requests simultaneously).

6. Accelerate Your Downloads

Frequent downloaders can save huge amounts of time by using a download manager like our favorite, FlashGet. FlashGet creates multiple simultaneous download links, and then puts the file together afterward. All you do is click or drag download links to the FlashGet window; the program does the rest. It integrates with Internet Explorer and Firefox using a companion utility called FlashGot.

(Sumber : pcworld.com)


Windows Hacked in Seconds via Firewire

Jumat, 14 Maret 2008

JUMAT, 14 MARET 2008

A New Zealand security researcher has published a software tool allowing attackers to quickly gain access to Windows systems via a Firewire port.

The tool, which can only be used by attackers with physical access to a system, comes shortly after the publication of research on gaining access to encrypted hard drives via physical access to memory.

Researcher Adam Boileau, a consultant with Immunity, originally demonstrated the access tool at a security conference in 2006, but decided not to release the code any further at the time. Two years later, however, nothing has been done toward fixing the problem, so he decided to go public.

"Yes, this means you can completely own any box whose Firewire port you can plug into in seconds," said Boileau in a recent blog entry.

An attacker must connect to the machine with a Linux system and a Firewire cable to run the tool.

The tool, called Winlockpwn, allows users to bypass Windows authorization, was originally demonstrated at Ruxcon in 2006 at a talk called "Hit By A Bus: Physical Access Attacks With Firewire".

At the time, Boileau also demonstrated some of the malicious uses of the tool, but said he wouldn't be releasing the code for those attacks.

The attack takes advantage of the fact that Firewire can directly read and write to a system's memory, adding extra speed to data transfer. According to Boileau, because this capability is built into Firewire, Microsoft doesn't consider the problem a standard bug.

On the other hand, Boileau said he feels PC users need to be more aware of the fact that their systems can be unlocked via Firewire.

"Yes, it's a feature, not a bug," Boileau stated. "Microsoft knows this. The OHCI-1394 spec knows this. People with Firewire ports generally don't."

Microsoft was not immediately available for comment. In the past the company has downplayed security problems that require physical access.

Firewire has become common on Windows systems in the past few years, and is especially prevalent on laptops.

Researcher Maximillian Dornseif demonstrated a similar exploit on Linux and Mac OS X systems at the CanSec conference in 2005, connecting to those systems via a malicious iPod and Firewire.

According to security researchers, the problem can be remedied by disabling Firewire when not in use.

Password-Stealing Hackers Infect Thousands of Web Pages

Kamis, 13 Maret 2008


KAMIS, 18 MARET 2008

Hackers looking to steal passwords used in popular online games have infected more than 10,000 Web pages in recent days.

The Web attack, which appears to be a coordinated effort run out of servers in China, was first noticed by McAfee researchers on Wednesday morning. Within hours, the security company had tracked more than 10,000 Web pages infected on hundreds of Web sites.

McAfee isn't sure how so many sites have been hacked, but "given how quickly some of these attacks have come on, it does seem like some automation has gone on," said Craig Schmugar, a researcher with McAfee's Avert Labs. In the past, attackers have used search engines to scour the Internet for vulnerable Web sites and then written automated tools to flood them with attacks, which ultimately let criminals use legitimate sites to serve up their malicious code.

The infected Web sites look no different than before, but the attackers have added a small bit of JavaScript code that redirects visitors' browsers to an invisible attack launched from the China-based servers. This same technique was used a year ago, when attackers infected the Web sites of the Miami Dolphins and Dolphins Stadium just prior to the 2007 Super Bowl XLI football game.

The attack code takes advantage of bugs that have already been patched, so users whose software is up-to-date are not at risk. However, McAfee warns that some of the exploits are for obscure programs such as ActiveX controls for online games, which users may not think to patch.

If the code is successful, it then installs a password-stealing program on the victim's computer that looks for passwords for a number of online games, including the Lord of the Rings Online.

These online game passwords are a popular hacker target, in part because many online gaming resources can be stolen and then sold for cash.

Other Attacks

Widespread Web attacks such as this are becoming more common too.

In January, security vendor Finjan reported a widespread hacking effort that infected 10,000 Web sites with malicious code that attacked visitors and then installed data-collecting software on their machines.

This type of attack is attractive to criminals, in part because it can be hard to thwart. "It's more subtle than spamming a malicious executable file to billions of e-mail addresses," Schmugar said. "You allow the people to go to the sites that they normally go to and pull off a low-scale attack that flies under the radar."

TIPS Membersihkan Virus Stargate

Senin, 10 Maret 2008

SENIN, 10 MARET 2008
Virus Stargate konon 'cukup' sulit untuk dibersihkan. Salah satu penyebab virus ini mampu bertahan adalah kemampuannya untuk me-redirect file eksekusi (exe/com/bat/pif/VBS/REG dan lnk) ke file virus. Namun bukan berarti virus ini tidak dapat dilumpuhkan. Ada satu celah yang dapat dimanfaatkan untuk membunuh virus tersebut. Virus ini tidak akan memblokir file yang berekstensi SCR.

Untuk membunuh virus ini Anda hanya membutuhkan beberapa tools seperti tools kill process (killvb.scr), registry viewer (regAlizer.scr) dan script untuk menghapus sisa string registry yang dibuat oleh virus (repair.vbs). Berikut cara membersihkan virus Stargate.
1. Putuskan hubungan komputer yang akan dibersihkan dari jaringan.
2. Sebaiknya lakukan pembersihan pada "safe mode".
3. Matikan proses virus. Untuk mematikan proses virus ini, Anda dapat menggunakan tools KillVB. Sebelum menjalankan file tersebut sebaiknya ganti ekstensi dari exe manjadi SCR agar
tidak diblok oleh virus.

4. Hapus registry yang dibuat oleh virus. Untuk mempermudah proses pembersihan, salin script di bawah ini pada program notepad kemudian simpan dengan nama repair.vbs. Jalankan file repair.vbs dengan cara klik 2x file tersebut.

Dim oWSH: Set oWSH = CreateObject("WScript.Shell")


on error resume Next
oWSH.Regwrite "HKEY_LOCAL_MACHINE\Software\CLASSES\batfile\shell\open\command\","""%1"" %*"
oWSH.Regwrite "HKEY_LOCAL_MACHINE\Software\CLASSES\comfile\shell\open\command\","""%1"" %*"
oWSH.Regwrite "HKEY_LOCAL_MACHINE\Software\CLASSES\exefile\shell\open\command\","""%1"" %*"
oWSH.Regwrite "HKEY_LOCAL_MACHINE\Software\CLASSES\piffile\shell\open\command\","""%1"" %*"
oWSH.Regwrite "HKEY_LOCAL_MACHINE\Software\CLASSES\lnkfile\shell\open\command\","""%1"" %*"
oWSH.Regwrite "HKEY_LOCAL_MACHINE\Software\CLASSES\regfile\shell\open\command\","regedit.exe %1"
oWSH.RegDelete("HKEY_CURRENT_USER\SOFTWARE\Microsoft\Windows\CurrentVersion\Policies\system\DisableRegistryTools")
oWSH.RegDelete("HKEY_LOCAL_MACHINE\SOFTWARE\Microsoft\Windows\CurrentVersion\Policies\system\DisableRegistryTools")
oWSH.Regwrite "HKEY_LOCAL_MACHINE\SYSTEM\ControlSet001\Control\SafeBoot\AlternateShell","cmd.exe"
oWSH.Regwrite "HKEY_LOCAL_MACHINE\SYSTEM\ControlSet002\Control\SafeBoot\AlternateShell","cmd.exe"
oWSH.Regwrite "HKEY_LOCAL_MACHINE\SYSTEM\ControlSet003\Control\SafeBoot\AlternateShell","cmd.exe"
oWSH.Regwrite "HKEY_LOCAL_MACHINE\SYSTEM\CurrentControlSet\Control\SafeBoot\AlternateShell","cmd.exe"
oWSH.Regwrite "HKEY_LOCAL_MACHINE\SOFTWARE\Microsoft\Windows NT\CurrentVersion\Winlogon\Shell","Explorer.exe"
oWSH.Regwrite "HKEY_LOCAL_MACHINE\SOFTWARE\Classes\exefile\","Application"
oWSH.Regwrite "HKEY_LOCAL_MACHINE\SOFTWARE\Classes\inffile\","Setup Information"
oWSH.Regwrite "HKEY_LOCAL_MACHINE\SOFTWARE\Microsoft\Windows NT\CurrentVersion\AeDebug\Debugger",""
oWSH.Regwrite "HKEY_CURRENT_USER\Software\Microsoft\Internet Explorer\Main\Start Page","About:Blank"
oWSH.Regwrite "HKEY_CURRENT_USER\Control Panel\Desktop\SCRNSAVE.EXE",""
oWSH.Regwrite "HKEY_CLASSES_ROOT\exefile\DefaultIcon\","%1"
oWSH.RegDelete("HKEY_CURRENT_USER\Software\Microsoft\Windows\CurrentVersion\Policies\System\DisableTaskMgr")
oWSH.RegDelete("HKEY_CURRENT_USER\Software\Microsoft\Windows\CurrentVersion\Policies\Explorer\NoFind")
oWSH.RegDelete("HKEY_CURRENT_USER\Software\Microsoft\Windows\CurrentVersion\Policies\Explorer\NoFolderOptions")
oWSH.RegDelete("HKEY_CURRENT_USER\Software\Microsoft\Windows\CurrentVersion\Policies\Explorer\NoRun")
oWSH.RegDelete("HKEY_CURRENT_USER\Software\Microsoft\Windows\CurrentVersion\Policies\Explorer\NoSetFolders")
oWSH.RegDelete("HKEY_CURRENT_USER\Software\Microsoft\Windows\CurrentVersion\Policies\Explorer\NoSetTaskbar")
oWSH.RegDelete("HKEY_CURRENT_USER\Software\Microsoft\Windows\CurrentVersion\Policies\Explorer\NoTrayContextMenu")
oWSH.RegDelete("HKEY_LOCAL_MACHINE\SOFTWARE\Policies\Microsoft\Windows NT\SystemRestore\DisableSR")
oWSH.RegDelete("HKEY_LOCAL_MACHINE\SOFTWARE\Policies\Microsoft\Windows NT\SystemRestore\DisableConfig")
oWSH.RegDelete("HKEY_LOCAL_MACHINE\SOFTWARE\Policies\Microsoft\Windows NT\SystemRestore\")
oWSH.RegDelete("HKEY_LOCAL_MACHINE\SOFTWARE\Microsoft\Windows\CurrentVersion\Run\System Monitoring")
oWSH.RegDelete("HKEY_LOCAL_MACHINE\SOFTWARE\Microsoft\Windows\CurrentVersion\policies\system\DisableCMD")
oWSH.RegDelete("HKEY_CURRENT_USER\SOFTWARE\Microsoft\Windows\CurrentVersion\policies\system\DisableCMD")
oWSH.RegDelete("HKEY_LOCAL_MACHINE\Software\Microsoft\Windows\CurrentVersion\Policies\System\DisableTaskMgr")
oWSH.RegDelete("HKEY_LOCAL_MACHINE\SOFTWARE\Policies\Microsoft\Windows\Installer\LimitSystemRestoreCheckpointing")
oWSH.RegDelete("HKEY_LOCAL_MACHINE\SOFTWARE\Policies\Microsoft\Windows\Installer\DisableMSI")
oWSH.RegDelete("HKEY_CURRENT_USER\Software\Microsoft\Internet Explorer\Main\Windows Title")
oWSH.RegDelete("HKEY_LOCAL_MACHINE\SOFTWARE\Microsoft\Windows\CurrentVersion\Run\System Monitoring ")
oWSH.RegDelete("HKEY_LOCAL_MACHINE\SOFTWARE\Microsoft\Windows\CurrentVersion\Run\LogonNetworkService")
oWSH.RegDelete("HKEY_CURRENT_USER\SOFTWARE\Microsoft\Windows\CurrentVersion\Run\st4rg4tE")
oWSH.RegDelete("HKEY_LOCAL_MACHINE\SOFTWARE\Microsoft\Windows\CurrentVersion\policies\Explorer\DisallowRun")
oWSH.RegDelete("HKEY_LOCAL_MACHINE\SOFTWARE\Microsoft\Windows\CurrentVersion\policies\Explorer\NoFind")
oWSH.RegDelete("HKEY_LOCAL_MACHINE\SOFTWARE\Microsoft\Windows\CurrentVersion\policies\Explorer\DisallowRun\")
oWSH.RegDelete("HKEY_CURRENT_USER\SOFTWARE\Microsoft\Windows\CurrentVersion\policies\Explorer\DisallowRun\")
oWSH.RegDelete("HKEY_CURRENT_USER\SOFTWARE\Microsoft\Windows\CurrentVersion\policies\Explorer\DisallowRun")
oWSH.RegDelete("HKEY_CURRENT_USER\SOFTWARE\Microsoft\Windows\CurrentVersion\policies\Explorer\NoFind")
oWSH.RegDelete("HKEY_LOCAL_MACHINE\SOFTWARE\Microsoft\Windows NT\CurrentVersion\Image File Execution Options\ansav.exe\")
oWSH.RegDelete("HKEY_LOCAL_MACHINE\SOFTWARE\Microsoft\Windows NT\CurrentVersion\Image File Execution Options\ansav32.exe\")
oWSH.RegDelete("HKEY_LOCAL_MACHINE\SOFTWARE\Microsoft\Windows NT\CurrentVersion\Image File Execution Options\ansavgd.exe\")
oWSH.RegDelete("HKEY_LOCAL_MACHINE\SOFTWARE\Microsoft\Windows NT\CurrentVersion\Image File Execution Options\Avguard.exe\")
oWSH.RegDelete("HKEY_LOCAL_MACHINE\SOFTWARE\Microsoft\Windows NT\CurrentVersion\Image File Execution Options\attrib.exe\")
oWSH.RegDelete("HKEY_LOCAL_MACHINE\SOFTWARE\Microsoft\Windows NT\CurrentVersion\Image File Execution Options\Avscan.exe\")
oWSH.RegDelete("HKEY_LOCAL_MACHINE\SOFTWARE\Microsoft\Windows NT\CurrentVersion\Image File Execution Options\ClamWinPortable.exe\")
oWSH.RegDelete("HKEY_LOCAL_MACHINE\SOFTWARE\Microsoft\Windows NT\CurrentVersion\Image File Execution Options\command.com\")
oWSH.RegDelete("HKEY_LOCAL_MACHINE\SOFTWARE\Microsoft\Windows NT\CurrentVersion\Image File Execution Options\firefox.exe\")
oWSH.RegDelete("HKEY_LOCAL_MACHINE\SOFTWARE\Microsoft\Windows NT\CurrentVersion\Image File Execution Options\iexplore.exe\")
oWSH.RegDelete("HKEY_LOCAL_MACHINE\SOFTWARE\Microsoft\Windows NT\CurrentVersion\Image File Execution Options\msconfig.exe\")
oWSH.RegDelete("HKEY_LOCAL_MACHINE\SOFTWARE\Microsoft\Windows NT\CurrentVersion\Image File Execution Options\PCMAV-CLN.exe\")
oWSH.RegDelete("HKEY_LOCAL_MACHINE\SOFTWARE\Microsoft\Windows NT\CurrentVersion\Image File Execution Options\PCMAV-RTP.exe\")
oWSH.RegDelete("HKEY_LOCAL_MACHINE\SOFTWARE\Microsoft\Windows NT\CurrentVersion\Image File Execution Options\PCMAV-SE.exe\")
oWSH.RegDelete("HKEY_LOCAL_MACHINE\SOFTWARE\Microsoft\Windows NT\CurrentVersion\Image File Execution Options\setup.exe\debugger\")
oWSH.RegDelete("HKEY_LOCAL_MACHINE\SOFTWARE\Microsoft\Windows NT\CurrentVersion\Image File Execution Options\ViRemoval.exe\")
oWSH.RegDelete("HKEY_LOCAL_MACHINE\SOFTWARE\Microsoft\Windows NT\CurrentVersion\Image File Execution Options\Winamp.exe\")
oWSH.RegDelete("HKEY_LOCAL_MACHINE\SOFTWARE\Microsoft\Windows NT\CurrentVersion\Image File Execution Options\Winrar.exe\")
oWSH.RegDelete("HKEY_LOCAL_MACHINE\SOFTWARE\Microsoft\Windows NT\CurrentVersion\Image File Execution Options\Winzip.exe\")
oWSH.RegDelete("HKEY_LOCAL_MACHINE\SOFTWARE\Microsoft\Windows NT\CurrentVersion\Image File Execution Options\antv-md5-pattern.exe\")
oWSH.RegDelete("HKEY_LOCAL_MACHINE\SOFTWARE\Microsoft\Windows NT\CurrentVersion\Image File Execution Options\Msconfig.exe\")
oWSH.RegDelete("HKEY_LOCAL_MACHINE\SOFTWARE\Microsoft\Windows NT\CurrentVersion\Image File Execution Options\regedit.exe\")
oWSH.RegDelete("HKEY_LOCAL_MACHINE\SOFTWARE\Microsoft\Windows NT\CurrentVersion\Image File Execution Options\cmd.exe\")
oWSH.RegDelete("HKEY_LOCAL_MACHINE\SOFTWARE\Microsoft\Windows NT\CurrentVersion\Image File Execution Options\taskmgr.exe\")
oWSH.RegDelete("HKEY_LOCAL_MACHINE\SOFTWARE\Microsoft\Windows NT\CurrentVersion\Image File Execution Options\cmd.exe\")
oWSH.RegDelete("HKEY_LOCAL_MACHINE\SOFTWARE\Microsoft\Windows NT\CurrentVersion\Image File Execution Options\regedit32.exe\")
oWSH.RegDelete("HKEY_LOCAL_MACHINE\SOFTWARE\Microsoft\Windows NT\CurrentVersion\Image File Execution Options\RegistriEditor.exe\")
oWSH.RegDelete("HKEY_LOCAL_MACHINE\SOFTWARE\Microsoft\Windows NT\CurrentVersion\Image File Execution Options\rstrui.exe\")
oWSH.RegDelete("HKEY_LOCAL_MACHINE\SOFTWARE\Microsoft\Windows NT\CurrentVersion\Image File Execution Options\avgnt.exe\")
oWSH.RegDelete("HKEY_LOCAL_MACHINE\SOFTWARE\Microsoft\Windows NT\CurrentVersion\Image File Execution Options\avgw.exe\")
oWSH.RegDelete("HKEY_LOCAL_MACHINE\SOFTWARE\Microsoft\Windows NT\CurrentVersion\Image File Execution Options\cclaw.exe\")
oWSH.RegDelete("HKEY_LOCAL_MACHINE\SOFTWARE\Microsoft\Windows NT\CurrentVersion\Image File Execution Options\killvb.exe\")
oWSH.RegDelete("HKEY_LOCAL_MACHINE\SOFTWARE\Microsoft\Windows NT\CurrentVersion\Image File Execution Options\nip.exe\")
oWSH.RegDelete("HKEY_LOCAL_MACHINE\SOFTWARE\Microsoft\Windows NT\CurrentVersion\Image File Execution Options\nipsvc.exe\")
oWSH.RegDelete("HKEY_LOCAL_MACHINE\SOFTWARE\Microsoft\Windows NT\CurrentVersion\Image File Execution Options\niu.exe\")
oWSH.RegDelete("HKEY_LOCAL_MACHINE\SOFTWARE\Microsoft\Windows NT\CurrentVersion\Image File Execution Options\njeeves.exe\")
oWSH.RegDelete("HKEY_LOCAL_MACHINE\SOFTWARE\Microsoft\Windows NT\CurrentVersion\Image File Execution Options\notepad.exe\")
oWSH.RegDelete("HKEY_LOCAL_MACHINE\SOFTWARE\Microsoft\Windows NT\CurrentVersion\Image File Execution Options\nvccf.exe\")
oWSH.RegDelete("HKEY_LOCAL_MACHINE\SOFTWARE\Microsoft\Windows NT\CurrentVersion\Image File Execution Options\nvcoas.exe\")
oWSH.RegDelete("HKEY_LOCAL_MACHINE\SOFTWARE\Microsoft\Windows NT\CurrentVersion\Image File Execution Options\nvcod.exe\")
oWSH.RegDelete("HKEY_LOCAL_MACHINE\SOFTWARE\Microsoft\Windows NT\CurrentVersion\Image File Execution Options\PCMAV.exe\")
oWSH.RegDelete("HKEY_LOCAL_MACHINE\SOFTWARE\Microsoft\Windows NT\CurrentVersion\Image File Execution Options\zanda.exe\")
oWSH.RegDelete("HKEY_LOCAL_MACHINE\SOFTWARE\Microsoft\Windows NT\CurrentVersion\Image File Execution Options\zlh.exe\")
oWSH.RegDelete("HKEY_LOCAL_MACHINE\SOFTWARE\Microsoft\Windows NT\CurrentVersion\Image File Execution Options\URemovalCRC32.exe\")
oWSH.Regwrite "HKEY_CLASSES_ROOT\mp3file\DefaultIcon\","C:\Program Files\Windows Media Player\wmplayer.exe,-120"
oWSH.Regwrite "HKEY_CLASSES_ROOT\inffile\DefaultIcon\","shell32.dll,-151"
oWSH.Regwrite "HKEY_CLASSES_ROOT\inifile\DefaultIcon\","shell32.dll,-151"
oWSH.Regwrite "HKEY_CLASSES_ROOT\mpegfile\DefaultIcon\","shell32.dll,-120"
oWSH.Regwrite "HKEY_CLASSES_ROOT\mp3file\shell\open\command\","C:\Program Files\Windows Media Player\wmplayer.exe"
oWSH.Regwrite "HKEY_CLASSES_ROOT\mpegfile\shell\open\command\","C:\Program Files\Windows Media Player\wmplayer.exe"
oWSH.Regwrite "HKEY_CLASSES_ROOT\txtfile\","Text Documents"
oWSH.Regwrite "HKEY_CLASSES_ROOT\txtfile\DefaultIcon\","shell32.dll,-152"
oWSH.Regwrite "HKEY_CLASSES_ROOT\jpegfile\","JPEG Image"
oWSH.Regwrite "HKEY_CLASSES_ROOT\jpegfile\DefaultIcon\","shimgvw.dll,3"
oWSH.Regwrite "HKEY_CLASSES_ROOT\dllfile\DefaultIcon\","shell32.dll,-154"
oWSH.Regwrite "HKEY_LOCAL_MACHINE\SOFTWARE\Classes\inifile\shell\open\command\","C:\WINDOWS\System32\notepad.exe %1"
oWSH.Regwrite "HKEY_LOCAL_MACHINE\SOFTWARE\Classes\inffile\shell\open\command\","C:\WINDOWS\System32\notepad.exe %1"
oWSH.Regwrite "HKEY_CLASSES_ROOT\Directory\shell\","none"
oWSH.Regwrite "HKEY_CLASSES_ROOT\Folder\shell\",""

Sebelum menjalankan file repair.vbs sebaiknya Anda set terlebih dahulu registry berikut dengan tujuan agar dapat mejalankan file repair.vbs tersebut, karena jika tidak diubah maka file tersebut akan diblok karena berekstensi .VBS.

Berikut key yang harus anda set:

HKEY_LOCAL_MACHINE\SOFTWARE\Classes\exefile\shell\open\commandkemudian set registry pada string Default menjadi "%1" %*
HKEY_LOCAL_MACHINE\SOFTWARE\Classes\VBSFile\Shell\Open\Command

Kemudian set registry pada string Default menjadi %SystemRoot%\System32\WScript.exe "%1" %*


Untuk set string ini, Anda dapat menggunakan tools RegAlizer. Anda dapat men-download tools tersebut di sini. Kemudian jalankan file repair.vbs.


5. Hapus file induk dengan menggunakan gunakan fungsi "Search Windows". Ciri-ciri file tersebut sebagai berikut:

  • Menggunakan Icon Folder
  • Berukuran 46 KB
  • Type File "Application"
  • Ekstensi Exe dan Com

Sebelum mencari file virus tersebut, tampilkan terlebih dahulu file yang tersembunyi pada Folder Option, caranya adalah:

  • Buka Windows Explorer
  • Klik menu "Tools"
  • Klik "Folder Option"
  • Klik tabulasi "View"
  • Pada kolom "Advanced settings", pada "Hiddenfiles and folders" lakukan langkah berikut:
  • Pilih opsi "Show hidden files and folders"
  • Uncheck opsi "Hide extenton for known file types"
  • Uncheck opsi "Hide protected operating system files (Recommanded)"

  • Klik "Apply"
  • Klik "OK"

Setelah itu cari file virus dengan menggunakan "Search", kemudian hapus file induk dan file duplikat virus.

6. Ubah attribut file GPT.INI yang ada di direktori C:\Windows\system32 dengan cara:

  • Klik "Start"
  • Klik "Run"
  • Ketik CMD
  • Pada layar Dos Prompt, ketik CD\ [enter]
  • Ketik CD windows\system32\GroupPolicy [enter]
  • Ketik ATTRIB -s -h -r GPT.ini [enter]


7. Untuk pembersihan optimal dan mencegah infeksi ulang, scan komputer dengan antivirus yang up-to-date dan sudah mengenali virus ini dengan baik.


(sumber: detikinet.com dwn / dwn )

virus Stargate Usili Halaman Browser Internet Explorer

SENIN, 10 MARET 2008


Jika ingin menggapai mimpi yang lebih indah
laksanakan dan kerjakan


Demikian bunyi pesan yang akan ditampilkan virus setiap kali menjalankan browser Internet Explorer (IE). Saat ini tengah beredar virus Stargate yang konon 'cukup' sulit untuk dibersihkan. Salah satu penyebab virus ini mampu bertahan adalah kemampuannya untuk me-redirect file eksekusi (exe/com/bat/pif/VBS/REG dan lnk) ke file virus.

Gejala lain yang muncul jika komputer Anda terkena virus ini adalah tipe file setiap direktori/folder akan berubah menjadi "Stargate" dan Anda juga tidak dapat membuka properties My Computer. Bukan cuma itu saja, virus ini juga akan memblok hampir semua aplikasi yang terinstal sehingga tidak dapat dijalankan dan muncul pesan error. Gejala lainnya, jika membuka "Folder Option" maka komputer akan langsung restart.

virus Stargate terdeteksi sebagai W32/Agent.DRRU. Ciri lain file virus ini antara lain menggunakan tipe file "Application" dan berekstensi exe.

Stargate dibuat dengan program bahasa Visual Basic. Untuk mengelabui pengguna, virus ini menggunakan icon Folder dengan ukuran file sebesar 46 KB. Jika file tersebut dijalankan maka ia akan membuat file induk yang akan dijalankan setiap kali komputer dinyalakan.

Stargate juga akan membuat string registry untuk memblok beberapa fungsi Windows seperti Task Manager, Regedit, Msconfig, Folder Option dan beberapa program keamanan termasuk antivirus, baik dengan cara memblok langsung/redirect ke file virus atau debugger ke program notepad.

Untuk mempertahankan dirinya, selain melakukan blok terhadap beberapa fungsi Windows dan program keamanan, Stargate juga akan aktif pada mode "safe mode" atau "safe mode with command prompt" sehingga semakin sulit untuk membersihkan virus ini.


Mengubah Startpage IE dan Icon MP3

Tidak ketinggalan, aplikasi Internet Explorer Windows menjadi sasaran virus ini yakni dengan mengubah startpage (halaman pembuka) untuk menjalankan file html yang sudah dibuat oleh virus tersebut. Halaman pembuka IE pun berubah menjadi hitam.

Virus stargate juga akan mengubah icon sejumlah file seperti MP3, Jpeg, Mpeg dan Txt, menjadi icon Folder. Ini merupakan salah satu rekayasa sosial yang akan digunakan untuk mengelabui user agar user beranggapan bahwa file tersebut merupakan file duplikat yang dibuat oleh virus atau file yang sudah diinjeksi oleh virus dengan harapan user akan menghapus file tersebut.

Jika komputer Anda sudah terinfeksi Stargate, maka pada saat Anda membuka folder/drive maka akan muncul layar "Search Windows". Stargate juga akan mencoba untuk memblokir akses ke MMC file dengan memunculkan pesan error seolah-olah user tidak mendapat akses untuk membuka file tersebut, contohnya gpedit.msc atau secpol.msc.

Agar virus ini dapat aktif secara otomatis tanpa harus menjalankan file virus, Stargate akan memanfaatkan fungsi Autorun Windows dengan membuat beberapa file yakni desktop.ini, folder.htt dan autorun.inf. Ketiga file ini akan dibuat di setiap drive termasuk di media Flash Disk sehingga dengan hanya mengakses drive tersebut secara otomatis akan mengaktifkan virus ini.

Flash Disk masih merupakan salah satu media yang akan digunakan oleh virus ini untuk menyebarkan dirinya dengan membuat beberapa file berikut:

  • Autorun.inf
  • Desktop.ini
  • Folder.htt
  • Msvbvm60.dll
  • DCIM.exe
  • Dirlist.exe
(sumber: detikinet.com ( dwn / dwn ))

Virus Bandot Falling In Love ... Selamat Hari VALENTINE ya....

Selasa, 04 Maret 2008

SELASA, 4 MARET 2008

Para pengguna komputer, jangan Ge Er dulu jika anda menjumpai file dengan nama “Kupu Malam” pada komputer anda, apalagi jika disertai ucapan (lihat gambar 1) :

Happy Valentine's Day !

Bandot Falling in love ... Selamat hari VALENTINE ya...

Percayalah pada kami, pesan tersebut tidak dikirimkan oleh rekan / pacar anda, tetapi oleh satu virus yang ikut-ikutan memanfaatkan event Valentine untuk menyebarkan dirinya. Selain menampilkan pesan di hari Valentine, virus yang kecentilan ini juga menampilkan pesan pada tanggal 17 Agustus, 25 Desember, 1 Januari dan 24 April. Kalau 3 tanggal pertama adalah hari Kemerdekaan, Natal dan Tahun Baru. Lalu tanggal 24 April ternyata bukan hari besar biasa, melainkan hari Ulang Tahun si pembuat virus (tsk...tsk..tsk... mengelus dada). Virus ini berusaha mengindikasikan “seolah-olah” dirinya berasal dari salah satu Universitas Komputer Top di Jakarta, tetapi kenyataan sebenarnya ... tanyakan saja pada si Bandot.

Gambaran umum

Bandot / VBWorm.NTH adalah salah satu jenis virus lokal yang kemungkinan berasal dari salah satu perguruan tinggi di bilangan Jakarta. Icon yang digunakanpun masih mengunakan icon Visual Basic jadi dapat dipastikan bahwa virus ini dibuat dengan menggunakan bahasa pemrograman “sejuta umat” Visual Basic, file ini akan mempunyai ukuran sebesar 88 KB (lihat gambar 2).

Gambar 2, File virus VBWorm.NTH

Secara umum virus ini tidaklah berbahaya, ia “hanya” akan menampilkan pesan yang mengganggu, dimana pesan tersebut akan ditampilkan pada tanggal yang telah tertentukan seperti pada saat Tahun Baru, Hari Valentine, Hari Kemerdekaan Indonesia atau pada saat Natal. VBWorm.NTH juga akan menampilkan pesan default ada hardware baru yang sudah terinstal dan siap digunakan, semua pesan tersebut akan muncul pada tray menu (lihat gambar 3).

Gambar 3, Pesan yang ditampilkan oleh VBWorm.NTH


Walapun virus ini akan blok regedit/cmd dan Folder Options tetapi sebenarnya tidaklah terlalu sulit untuk mematikan proses virus tersebut. Dengan bantuan tools pihak dari ketiga seperti process explorer atau currproses Anda sudah dapat mematikan proses virus kemudian menghapus file induk virus tersebut.


Aktif pada Safe Mode dan Safe Mode with Command Prompt

Hati-hati karena virus ini akan tetap aktif pada mode “safe mode” dan “safe mode with command prompt” . Untuk menyebarkan dirinya, ia akan menggunakan Flash Disk. Jadi hati-hati jika pada Fash Disk Anda terdapat file dengan nama Kupu Malam.exe atau kupu-k~1.exe dengan ukuran 88 KB serta menggunakan icon Visual Basic sebaiknya dihapus dan lakukan pembersihan baik secara manual atau menggunakan antivirus yang up-to-date dan sudah mengenali vius ini.

Ciri-ciri file virus : (lihat gambar 4)

  • Mengunakan icon Visual Basic

  • Ukuran file 88 KB

  • Type File “Application”

  • Dibuat dengan program bahasa Visual Basic

Gambar 4, File virus VBWorm.NTH

Jika file tersebut ditampilkan secara “Tile” (View – tiles) akan muncul informasi nama salah satu Universitas Ilmu Komputer Top di Jakarta. (lihat gambar 5).

Gambar 5, nama salah satu Universitas Komputer ditampilkan pada mode Tile View

Symptom:

  • Pada saat menjalankan regedit, maka akan muncul program Windows Media Player begitupun saat menjalankan CMD/Command

  • Muncul satu shortcut jika klik kanan pada folder/drive dengan nama bandot.

  • Muncul pesan pada tray menu. Pesan ini akan berubah-ubah sesuai dengan waktu yang telah ditentukan. Biasanya pesan ini akan muncul pada tanggal-tanggal tertentu seperti:

    • 14 Februari, Hari Valentine

    • 25 Desember, Natal

    • 1 Januari, Tahun baru

    • 24 April, ulang tahun si Bandot (Ngga tahan untuk komentar : tsk..tsk..tsk... dasar Narsis)

    • 17 Agustus Hari Kemerdekaan Indonesia

Diluar tanggal tersebut, virus ini akan memunculkan pesan bahwa terdapat Hardware yang baru terinstal dan siap digunakan (Your new hardware is installed and ready to use)


Norman Virus Control dengan update terbaru sudah dapat mengenali virus ini sebagai VBWorm.NTH (lihat gambar 6) :

Gambar 6, Norman Virus Control mendeteksi Bandot sebagai virus Worm W32/VBWorm.NTH


File yang akan dibuat

File induk VBWorm.NTH sebenarnya mudah untuk dikenali yakni akan menggunakan icon Visual Basic, pada saat virus tersebut dijalankan maka akan muncul program Windows Media Player. Hal ini dimaksudkan untuk mengelabui user sehingga user tidak menyadari VBWorm.NTH telah aktif yang kemudian akan membuat beberapa file induk yang akan dijalankan setiap kali komputer aktif (dihidupkan). Berikut beberapa file yang akan dibuat oleh VBWorm.NTH adalah sebagai berikut :

  • C:\BACA!!!.txt

  • C:\Windows\temp\Video~1.mpg.exe

  • C:\Windows\BandotBrobot.exe

  • C:\Windows\system32\Exblorer.exe

  • C:\Windows\inf\84nd0t8r080t (hidden)

    • csrsc.exe

    • lsasc.exe

    • scvhost.exe

    • smsc.exe

  • C:\Windows\system32\drivers\Ble'e.exe

  • C:\WIndows\system32\oobe\blaut.exe

  • C:\Windows\system32\cmd.pif

  • C:\Windows\system32\regedit.pif

Jika diperhatikan terdapat satu file TXT dengan nama BACA!!!.txt, jika file tersebut dibuka maka berisi text seperti terlihat pada gambar 7 dibawah ini :

Gambar 7, Isi file BACA!!!.txt


Registry Windows

Untuk memastikan agar dirinya dapat aktif setiap kali komputer dihidupkan, ia akan membuat beberapa string pada registry berikut:

HKEY_CURRENT_USER\Software\Microsoft\Windows\CurrentVersion\Run

- BandotOye = C:\WINDOWS\BandotBrobot.exe

- WindowsLogon = C:\WINDOWS\Inf\84nd0t8r080t\scvhost.exe

HKEY_LOCAL_MACHINE\SOFTWARE\Microsoft\Windows\CurrentVersion\Run

- LocalServices = C:\WINDOWS\Inf\84nd0t8r080t\lsasc.exe

- WinExblorerXX = C:\WINDOWS\system32\Exblorer.exe

HKEY_LOCAL_MACHINE\SOFTWARE\Microsoft\Windows NT\CurrentVersion\Winlogon

- Shell = explorer.exe "C:\WINDOWS\system32\Oobe\Blaut.exe"

- userinit =

C:\WINDOWS\system32\userinit.exe,C:\WINDOWS\system32\Drivers\Ble'e.exe


Aktif pada mode “safe mode” dan “safe mode command prompt”

VBWorm.NTH juga akan tetap aktif walaupun komputer booting pada mode “safe mode” atau “safe mode with comand prompt”. Agar dirinya dapat aktif pada mode tersebut, ia akan membuat beberapa string pada registry berikut:


HKEY_LOCAL_MACHINE\SOFTWARE\Microsoft\Windows NT\CurrentVersion\Winlogon

- Shell = explorer.exe "C:\WINDOWS\system32\Oobe\Blaut.exe"

- userinit =

C:\WINDOWS\system32\userinit.exe,C:\WINDOWS\system32\Drivers\Ble'e.exe

HKEY_LOCAL_MACHINE\SYSTEM\ControlSet001\Control\SafeBoot

- AlternateShell = C:\WINDOWS\system32\Oobe\Blaut.exe

HKEY_LOCAL_MACHINE\SYSTEM\CurrentControlSet\Control\SafeBoot

- AlternateShell = C:\WINDOWS\system32\Oobe\Blaut.exe

Shortcut “Bandot” untuk Logoff komputer

Coba anda klik kanan pada sembarang Folder atau Drive, apa yang anda temukan ? Ternyata akan muncul satu shortcut baru dengan nama Bandot. Jika user klik shortcut tersebut maka komputer akan Logoff (lihat gambar 8).


Untuk membuat shortcut tersebut, ia akan membuat string berikut:

HKEY_LOCAL_MACHINE\SOFTWARE\Classes\Folder\shell\Bandot\command

- default = logoff

Gambar 8, VBWorm.NTH menambahkan shortcut Bandot


Blok Fungsi Windows

Untuk melancarkan askinya, ia akan mencoba untuk blok beberapa fungsi Windows seperti :

  • Regedit

  • CMD

  • Folder Option

Kusus untuk blok program REGEDIT dan CMD, Vbworm.NTH akan mengalihkan ke file virus yang sudah dibuat dengan nama REGEDIT.PIF jika menjalankan REGEDIT dan CMD.PIF jika menjalanakn CMD yang secara otomatis akan mengaktifkan dirinya serta memanggil program Windows Media Player, hal ini dimaksudkan agar user tidak mencurigai bahwa sebenarnya virus ini telah aktif kembali. (lihat gambar 9)


Gambar 9, Windows Media Player aktif ketika menjalankan Regedit dan CMD


VBWorm.NTH sebenarnya tidak sampai disable atau menghilangkan menu Folder Option tetapi akan set agar user tidak dapat menampilkan file yang tersembunyi dan tidak dapat menampilkan ekstensi file. Untuk melakukan hal tersebut ia akan membuat string pada registry berikut:


HKEY_CURRENT_USER\Software\Microsoft\Windows\CurrentVersion\Explorer\Advanced

- Hidden = 0

- HideFileExt = 1

- ShowSuperHidden = 0

Blok virus Lokal (Kangen.A dan Riyani_Jangkaru (Tabaru)

VBWorm.NTH juga akan berusaha untuk mematikan proses virus lokal dan kali ini virus lokal yang menjadi targetnya adalah virus W32/Pesin.A dan Tabaru (Riyani_Jangkaru) dengan menjalankan perintah:

- taskkill /f /im xpshare.exe

- taskkill /f /im riyani_jangkaru.exe

- taskkill /f /im systray.exe


Pesan sang VM

Seperti yang sudah dijelaskan di atas bahwa pada tanggal-tanggal tertentu VBWorm.NTH akan menampilkan pesan pada tray menu yakni :

  • 14 Februari, Hari Valentine (lihat gambar 1)

  • 25 Desember, Natal (lihat gambar 10)

Gambar 10

  • 1 Januari, Tahun baru (lihat gambar 11)

Gambar 11

  • 24 April ulang tahun si Bandot (gambar 12)

Gambar 12, Bandot narsis

  • 17 Agustus Hari Kemerdekaan Indonesia (gambar 13)

Gambar 13, Bandot sok ngajar sejarah

Diluar tanggal tersebut, virus ini akan memunculkan pesan bahwa terdapat Hardware yang baru telah terinstal dan siap digunakan (Your new hardware is installed and ready to use), lihat gambar 14


Gambar 14


Media penyebaran

Sama seperti virus lokal lainnya, untuk menyebarkan dirinya VBWorm.NTH akan menggunakan Flash Disk dengan mengkopikan dirinya dengan nama Kupu malam.exe atau kupu-k~1.exe. File ini mempunyai ukuran 88 KB dengan icon Visual Basic.

Bagaimana cara membersihkan VBWorm.NTH ?

  1. Putuskan hubungan komputer yang akan dibersihkan dari jaringan

  2. Disable “System Restore” selama proses bembersihan (jika menggunakan Windows ME/XP/Vista)

  3. Matikan proses virus yang aktif dimemori. Untuk mematikan proses virus tersebut Anda dapat menggunakan tools “Currprocess”.

Silahkan download tools Currprocess di alamat berikut:

http://www.nirsoft.net/utils/cprocess.zip

    Kemudian matikan proses virus yang mempunyai icon Visual Basic dengan nama file:

    • csrsc.exe

    • lsasc.exe

    • scvhost.exe

    • smsc.exe (lihat gambar 15)

Gambar 15, Mematikan proses virus

  1. Hapus registry yang dibuat oleh virus. Untuk mempercepat proses penghapusan salin script dibawah ini pada program "notepad" kemudian simpan dengan nama REPAIR.INF setelah itu jalankan file tersebut dengan cara

    1. Klik kanan REPAIR.INF

    2. Klik Install

[Version]

Signature="$Chicago$"

Provider=Vaksincom Oye

[DefaultInstall]

AddReg=UnhookRegKey

DelReg=del

[UnhookRegKey]

HKLM, Software\CLASSES\batfile\shell\open\command,,,"""%1"" %*"

HKLM, Software\CLASSES\comfile\shell\open\command,,,"""%1"" %*"

HKLM, Software\CLASSES\exefile\shell\open\command,,,"""%1"" %*"

HKLM, Software\CLASSES\piffile\shell\open\command,,,"""%1"" %*"

HKLM, Software\CLASSES\regfile\shell\open\command,,,"regedit.exe "%1""

HKLM, Software\CLASSES\scrfile\shell\open\command,,,"""%1"" %*"

HKLM, SOFTWARE\Microsoft\Windows NT\CurrentVersion\Winlogon, Shell,0, "Explorer.exe"

HKLM, SYSTEM\ControlSet001\Control\SafeBoot, AlternateShell,0, "cmd.exe"

HKLM, SYSTEM\ControlSet002\Control\SafeBoot, AlternateShell,0, "cmd.exe"

HKLM, SYSTEM\CurrentControlSet\Control\SafeBoot, AlternateShell,0, "cmd.exe"

[del]

HKCU, Software\Microsoft\Windows\CurrentVersion\Policies\System, DisableRegistryTools

HKCU, Software\Microsoft\Windows\CurrentVersion\Policies\System, DisableTaskMgr

HKCU, Software\Microsoft\Windows\CurrentVersion\Policies\Explorer, NoFolderOptions

HKCU, Software\Microsoft\Windows\CurrentVersion\Policies\Explorer, NOFind

HKCU, Software\Microsoft\Windows\CurrentVersion\Policies\Explorer, NORun

HKCU, Software\Microsoft\Windows\CurrentVersion\Policies\Explorer\Advanced, hidden

HKCU, Software\Microsoft\Windows\CurrentVersion\Policies\WinOldApp

HKCU, Software\Microsoft\Windows\CurrentVersion\Run, BandotOye

HKCU, Software\Microsoft\Windows\CurrentVersion\Run, WindowsLogon

HKLM, SOFTWARE\Microsoft\Windows\CurrentVersion\Run, LocalServices

HKLM, SOFTWARE\Microsoft\Windows\CurrentVersion\Run, WinExblorerXX

HKLM, SOFTWARE\Classes\Folder\shell\Bandot

  1. Hapus file induk virus VBWorm.NTH. Sebelum menghapus file induk tersebut sebaiknya tampilkan file yang tersembunyi karena ada beberapa file induk virus yang disembunyikan.

Untuk menampilkan file yang tersebunyi, lakukan langkah dibawah ini:

    • Buka WIndows Explorer

    • Klik menu "Tools"

    • Klik "Folder Option"

    • Kli tabulasi "View"

    • Pada kolom "Advanced settings"

      • Pilih opsi "Hidden files and folders"

      • Hilangkan centang pada “Hide extensions for known file types”

      • Hiangkan centang pada “Hide protected operating system files (Recommended)”

  • Klik “OK”

Kemudian hapus file berikut:

  • C:\BACA!!!.txt

  • C:\Windows\temp\Video~1.mpg.exe

  • C:\Windows\BandotBrobot.exe

  • C:\Windows\system32\Exblorer.exe

  • C:\Windows\inf\84nd0t8r080t (hidden)

  • csrsc.exe

  • lsasc.exe

  • scvhost.exe

  • smsc.exe

  • C:\Windows\system32\drivers\Ble'e.exe

  • C:\WIndows\system32\oobe\blaut.exe

  • C:\Windows\system32\cmd.pif

  • C:\Windows\system32\regedit.pif

  1. Untuk pembersihan optimal dan mencegah infeksi ulang, silahkan scan dengan Norman Virus Control yang sudah dapat mendeteksi virus ini dengan baik.


(sumber : vaksin.com /Aj Tau)


eXTReMe Tracker
Powered By Blogger